Ver. 240629
*주의*
- killer.sh 문제풀이 정리용
- Use context : ~ 조건은 적용하지 않았음
(실습환경에는 1개의 마스터노드와 2개의 워커노드가 있는 1개의 클러스터 환경에서 작업
control-plane은 master라고 naming되어 있음)
- 일부 udemy lab을 사용
- 오류 있을 수 있음
Qusestion 21 | Create a Static Pod and Service
Use context: kubectl config use-context k8s-c3-CCC
Create a Static Pod named my-static-pod in Namespace default on cluster3-controlplane1. It should be of image nginx:1.16-alpine and have resource requests for 10m CPU and 20Mi memory.
Then create a NodePort Service named static-pod-service which exposes that static Pod on port 80 and check if it has Endpoints and if it's reachable through the cluster3-controlplane1 internal IP address. You can connect to the internal node IPs from your main terminal.
Answer:
cd /etc/kubernetes/manifests/

kubectl run my-static-pod \
    --image=nginx:1.16-alpine \
    -o yaml --dry-run=client > my-static-pod.yaml
Then edit the my-static-pod.yaml to add the requested resource requests:

# /etc/kubernetes/manifests/my-static-pod.yaml
apiVersion: v1
kind: Pod
metadata:
  creationTimestamp: null
  labels:
    run: my-static-pod
  name: my-static-pod
spec:
  containers:
  - image: nginx:1.16-alpine
    name: my-static-pod
    resources:
      requests:
        cpu: 10m
        memory: 20Mi
  dnsPolicy: ClusterFirst
  restartPolicy: Always
status: {}
k expose pod my-static-pod --name=static-pod-service --port=80 --type=NodePort --dry-run=client -o yaml

// svc.yaml
apiVersion: v1
kind: Service
metadata:
  creationTimestamp: null
  labels:
    run: my-static-pod
  name: static-pod-service
spec:
  ports:
  - port: 80
    protocol: TCP
    targetPort: 80
  selector:
    run: my-static-pod
  type: NodePort
status:
  loadBalancer: {}
https://kubernetes.io/docs/tasks/configure-pod-container/static-pod/
Create static Pods
Static Pods are managed directly by the kubelet daemon on a specific node, without the API server observing them. Unlike Pods that are managed by the control plane (for example, a Deployment); instead, the kubelet watches each static Pod (and restarts it i
kubernetes.io
https://kubernetes.io/docs/concepts/services-networking/service/
Service
Expose an application running in your cluster behind a single outward-facing endpoint, even when the workload is split across multiple backends.
kubernetes.io
★
Qusestion 22 | Check how long certificates are valid
Use context: kubectl config use-context k8s-c2-AC
Check how long the kube-apiserver server certificate is valid on cluster2-controlplane1. Do this with openssl or cfssl. Write the exipiration date into /opt/course/22/expiration.
Also run the correct kubeadm command to list the expiration dates and confirm both methods show the same date.
Write the correct kubeadm command that would renew the apiserver server certificate into /opt/course/22/kubeadm-renew-certs.sh.
Answer:
// kube-apiserver
ssh cluster2-controlplane1
find /etc/kubernetes/pki | grep apiserver

//인증서 위치
/etc/kubernetes/pki/apiserver.crt

//openssl
openssl x509 -noout -text -in /etc/kubernetes/pki/apiserver.crt | grep Validity -A2

echo "Jul  3 00:16:25 2025 GMT" > /opt/course/22/expiration
kubeadm certs check-expiration | grep apiserver
# /opt/course/22/kubeadm-renew-certs.sh
kubeadm certs renew apiserver
https://kubernetes.io/docs/tasks/administer-cluster/kubeadm/kubeadm-certs/
Certificate Management with kubeadm
FEATURE STATE: Kubernetes v1.15 [stable] Client certificates generated by kubeadm expire after 1 year. This page explains how to manage certificate renewals with kubeadm. It also covers other tasks related to kubeadm certificate management. Before you begi
kubernetes.io
https://kubernetes.io/docs/reference/setup-tools/kubeadm/kubeadm-token/
kubeadm token
Bootstrap tokens are used for establishing bidirectional trust between a node joining the cluster and a control-plane node, as described in authenticating with bootstrap tokens. kubeadm init creates an initial token with a 24-hour TTL. The following comman
kubernetes.io
https://kubernetes.io/docs/tasks/administer-cluster/certificates/
Generate Certificates Manually
When using client certificate authentication, you can generate certificates manually through easyrsa, openssl or cfssl. easyrsa easyrsa can manually generate certificates for your cluster. Download, unpack, and initialize the patched version of easyrsa3. c
kubernetes.io
★
Qusestion 23 | Kubelet client/server cert info
Use context: kubectl config use-context k8s-c2-AC
Node cluster2-node1 has been added to the cluster using kubeadm and TLS bootstrapping.
Find the "Issuer" and "Extended Key Usage" values of the cluster2-node1:
1. kubelet client certificate, the one used for outgoing connections to the kube-apiserver.
2. kubelet server certificate, the one used for incoming connections from the kube-apiserver.
Write the information into file /opt/course/23/certificate-info.txt.
Compare the "Issuer" and "Extended Key Usage" fields of both certificates and make sense of these.
Answer:
ssh cluster2-node1

openssl x509  -noout -text -in /var/lib/kubelet/pki/kubelet-client-current.pem | grep Issuer

openssl x509  -noout -text -in /var/lib/kubelet/pki/kubelet-client-current.pem | grep "Extended Key Usage" -A1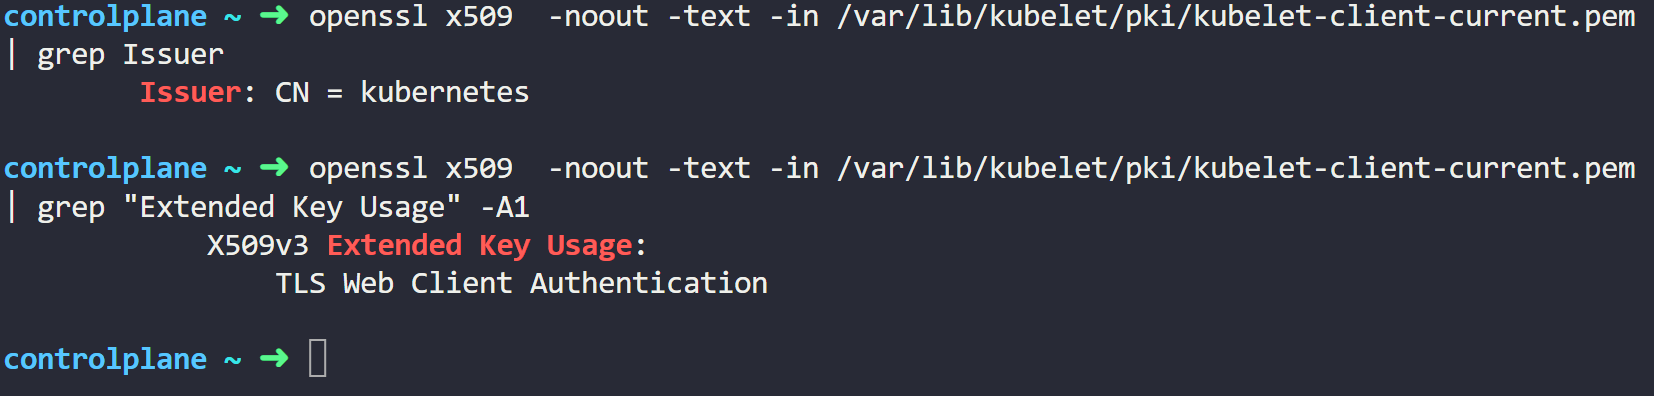
openssl x509  -noout -text -in /var/lib/kubelet/pki/kubelet.crt | grep Issuer

openssl x509  -noout -text -in /var/lib/kubelet/pki/kubelet.crt | grep "Extended Key Usage" -A1

/opt/course/23/certificate-info.txt
https://kubernetes.io/docs/reference/access-authn-authz/kubelet-tls-bootstrapping/
TLS bootstrapping
In a Kubernetes cluster, the components on the worker nodes - kubelet and kube-proxy - need to communicate with Kubernetes control plane components, specifically kube-apiserver. In order to ensure that communication is kept private, not interfered with, an
kubernetes.io
https://kubernetes.io/docs/reference/command-line-tools-reference/kubelet/
kubelet
Synopsis The kubelet is the primary "node agent" that runs on each node. It can register the node with the apiserver using one of: the hostname; a flag to override the hostname; or specific logic for a cloud provider. The kubelet works in terms of a PodSpe
kubernetes.io
Qusestion 24 | NetworkPolicy
Use context: kubectl config use-context k8s-c1-H
There was a security incident where an intruder was able to access the whole cluster from a single hacked backend Pod.
To prevent this create a NetworkPolicy called np-backend in Namespace project-snake. It should allow the backend-* Pods only to:
- connect to db1-* Pods on port 1111
- connect to db2-* Pods on port 2222
Use the app label of Pods in your policy.
After implementation, connections from backend-* Pods to vault-* Pods on port 3333 should for example no longer work.
Answer:
apiVersion: networking.k8s.io/v1
kind: NetworkPolicy
metadata:
  name: np-backend
  namespace: project-snake
spec:
  podSelector:
    matchLabels:
      app: backend
  policyTypes:
    - Egress                    # policy is only about Egress
  egress:
    -                           # first rule
      to:                           # first condition "to"
      - podSelector:
          matchLabels:
            app: db1
      ports:                        # second condition "port"
      - protocol: TCP
        port: 1111
    -                           # second rule
      to:                           # first condition "to"
      - podSelector:
          matchLabels:
            app: db2
      ports:                        # second condition "port"
      - protocol: TCP
        port: 2222
Network Policies
If you want to control traffic flow at the IP address or port level (OSI layer 3 or 4), NetworkPolicies allow you to specify rules for traffic flow within your cluster, and also between Pods and the outside world. Your cluster must use a network plugin tha
kubernetes.io
Qusestion 25 | Etcd Snapshot Save and Restore
Use context: kubectl config use-context k8s-c3-CCC
Make a backup of etcd running on cluster3-controlplane1 and save it on the controlplane node at /tmp/etcd-backup.db.
Then create any kind of Pod in the cluster.
Finally restore the backup, confirm the cluster is still working and that the created Pod is no longer with us.
Answer:
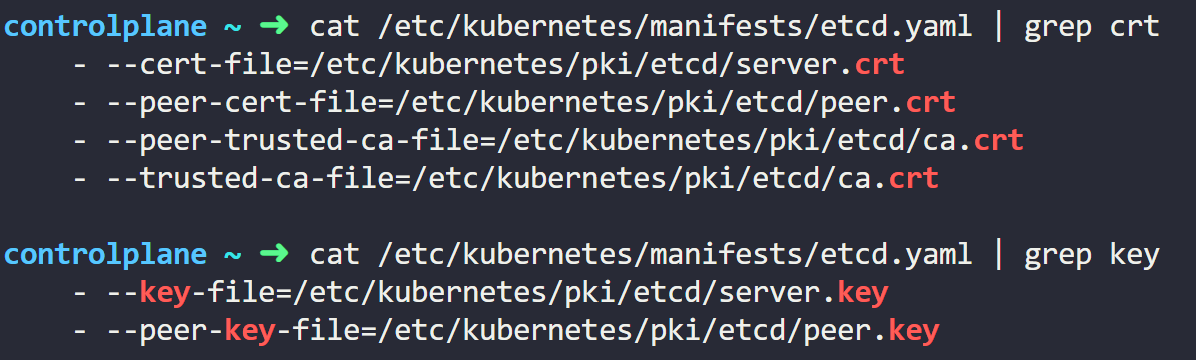
root@cluster3-controlplane1:~# ETCDCTL_API=3 etcdctl snapshot save /tmp/etcd-backup.db \
--cacert /etc/kubernetes/pki/etcd/ca.crt \
--cert /etc/kubernetes/pki/etcd/server.crt \
--key /etc/kubernetes/pki/etcd/server.key
<etcd 복원> ★★★
//임의의 pod 생성
kubectl run test --image=nginx

//etcd 복원
//컨트롤플레인의 구성요소를 모두 중지
root@controlplane:~# cd /etc/kubernetes/manifests/
root@controlplane:/etc/kubernetes/manifests# mv * ..

//백업을 특정디렉토리에 복원
ETCDCTL_API=3 etcdctl snapshot restore /tmp/etcd-backup.db \
--data-dir /var/lib/etcd-backup \
--cacert /etc/kubernetes/pki/etcd/ca.crt \
--cert /etc/kubernetes/pki/etcd/server.crt \
--key /etc/kubernetes/pki/etcd/server.key

//etcd.yaml 수정
  - hostPath:
      path: /var/lib/etcd-backup                # 변경
      type: DirectoryOrCreate
    name: etcd-data

//yaml파일을 다시 매니패스트 디렉토리로 이동
root@controlplane:/etc/kubernetes/manifests# mv ../*.yaml .

//etcd와 api-server가 다시 시작되도록 대기, Pod 확인Operating etcd clusters for Kubernetes
etcd is a consistent and highly-available key value store used as Kubernetes' backing store for all cluster data. If your Kubernetes cluster uses etcd as its backing store, make sure you have a back up plan for the data. You can find in-depth information a
kubernetes.io
'Cloud > CKA' 카테고리의 다른 글
| [CKA] killer.sh ( Preview Question 1 ~ 3 ) (0) | 2024.07.05 |
|---|---|
| [CKA] killer.sh ( Extra Question 1 ~ 2 ) (0) | 2024.07.05 |
| [CKA] killer.sh ( Question 11 ~ Question 20 ) (1) | 2024.07.02 |
| [CKA] killer.sh ( Question 1 ~ Question 10 ) (0) | 2024.06.30 |
| [CKA] PSI Bridge 시험 환경 적응하기 (0) | 2024.06.28 |